
DIY upholstery
In our last post, we said we are planning to sew our own upholstery. In this blog post, we’ll share our progress towards the said goal.
Vision
Peter’s parents were visiting for the entirety of July, and Peter’s mom made it clear that
- a) she would like to help (we theorize that’s because, before we even started the build, we pointed out that we cannot have kids until the aircraft is finished and flying, because we will not have bandwidth for kids AND airplane building)
- b) she is not interested in spending time in the hangar
We decided that our build can use a variety of expertise, and, since Peter’s mom used to sew (things ranging from backpacks and cave-climbing onezies to cute baby down jackets), we asked her to help us out with our upholstery sub-project. Also, just to recap, we decided to sew upholstery ourselves because of several reasons:
- customization by Sling was not super straightforward in terms of materials and colors of upholstery (and we wanted animal-friendly, stain-resistant ultraleather)
- large lead times on upholstery kits
- price (full leather upholstery by Sling is $5k+ :( )
- embroidery on upholstery not being standard anymore (and little airplanes are very important to us :))
In terms of our idea of how finished product should look like, we wanted something like this:
Modeling
To start, we measured Claude’s seats (which he graciously lent us for a bit), and made 3d models of seat backs and bottom cushions in Blender. We were not trying to make exact copies of Claude’s seats, rather, just get the back dimensions right.
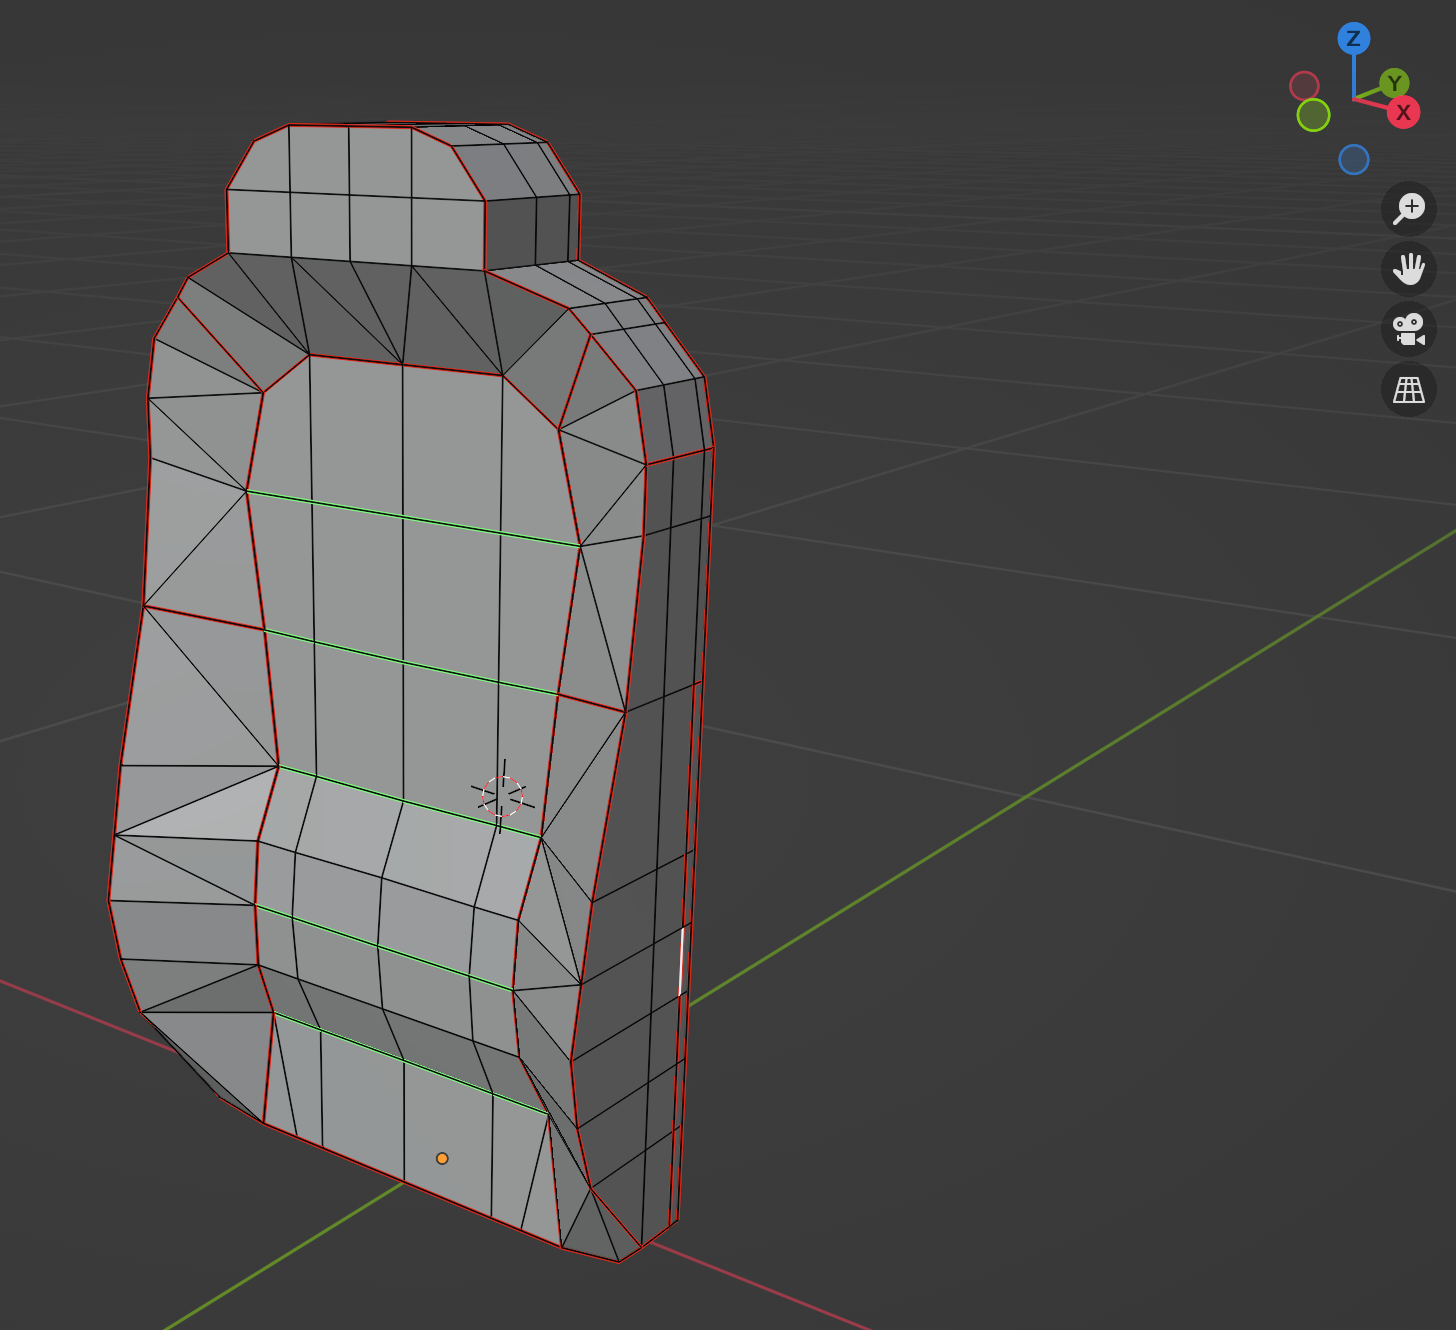
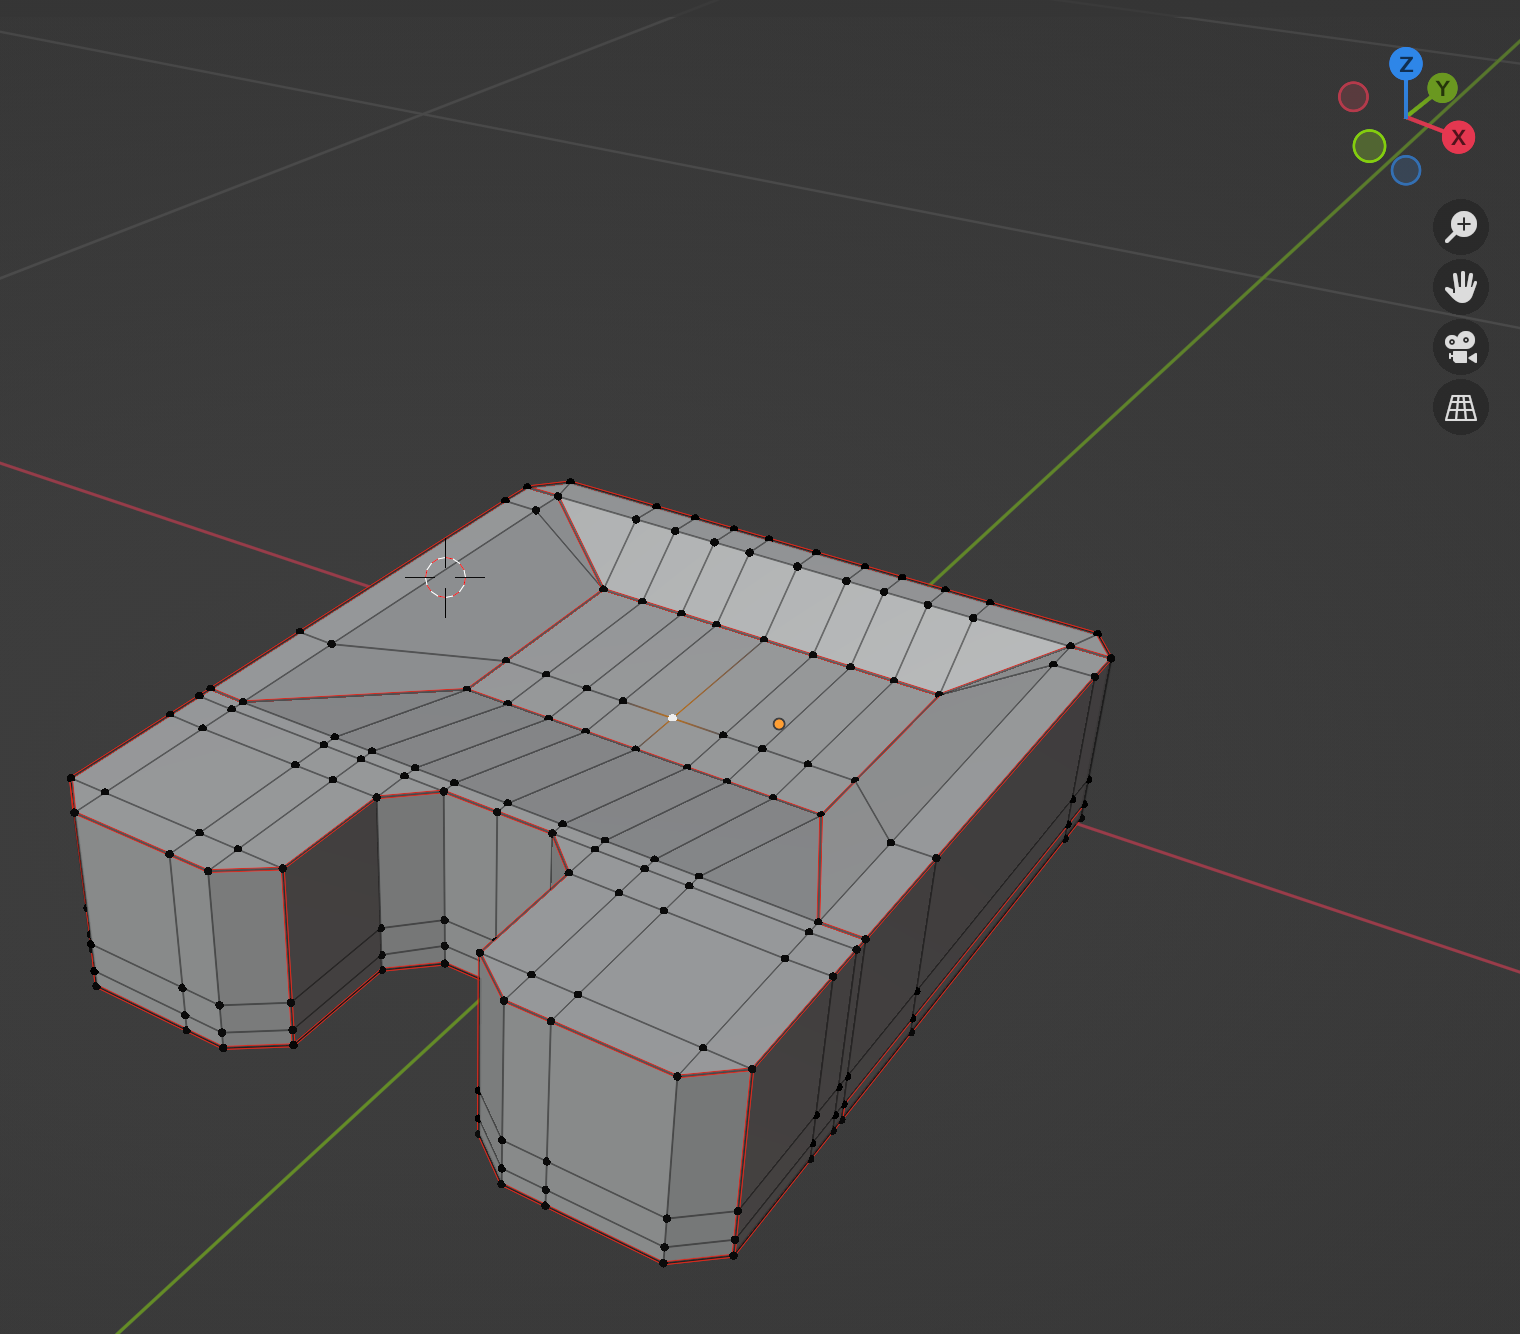
The edges that are marked red are supposed to be seams, and the edges that are marked blue are seam lines for pleats (note that in the vision picture above seat backs are pleated). Our resulting blender files are published here for the back and here for the bottom.
Next, we needed to convert blender models into sewing patterns. A proper professional way would be to get a patterning extension for AutoCAD, but license for that is several thousand USD, so that was a deterring factor for us. Instead, we used Blender’s 2.8 “Export Paper Model” Add-on. It did not quite work out of the box to create sewing patterns for three reasons:
- Numbers indicating how paper model is supposed to be glued together (or patterns sewn together) are printed outside the part, so when patterns are cut out, numbers are lost
- When gluing paper models together, the seam allowance (or “tab”) is added only on one side, whereas for sewing seam allowances are needed on both sides and
- Tabs have angled edges, so, if we were to use them directly, seam allowance would be discountinuous (this latter point is minor if you cut the patterns out by hand, because you can correct for this easily)
None of the issues above are deal breakers, in principle, but, since we went through multiple iterations of models (and, respectively, patterns), we wanted the process of model --> patterns to be as automated as possible.
To that end, the “Export Paper Model add-on” (just like the rest of blender) is open-source, so one could fork it, modify the code, and make a new add-on with all the necessary
functionality. We made a bare-bones version that makes patterns look reasonably nice, whenever we’ll have more time, it may receive some more love to make it more user-friendly (and potentially request to be integrated in the original add-on).
This is likely obvious to the readers, but in order for sewing patterns to be useful, they need to be to scale x1, which means that seam lines on the model may need to change based on what size of printer / plotter one has available. Neither default “Export to Paper Model” add-on, nor our modified version are particularly smart and need to be told manually which edges will be seams. In our case, we were using Cricut Explore Air 2 which we originally bought to cut out and “hand” write our wedding invitations. Maximum mat size for the Cricut is 12 x 24 inches (30 x 60 cm), so the models had to be split into pieces no larger that that.
Originally, we were planning to use Cricut to mark and cut the patterns directly on fabric. Turns out Cricut draws on fabric well, but cannot cut fabric well (it starts peeling fabric off). So we used Cricut to draw out the patterns, but cut them by hand.
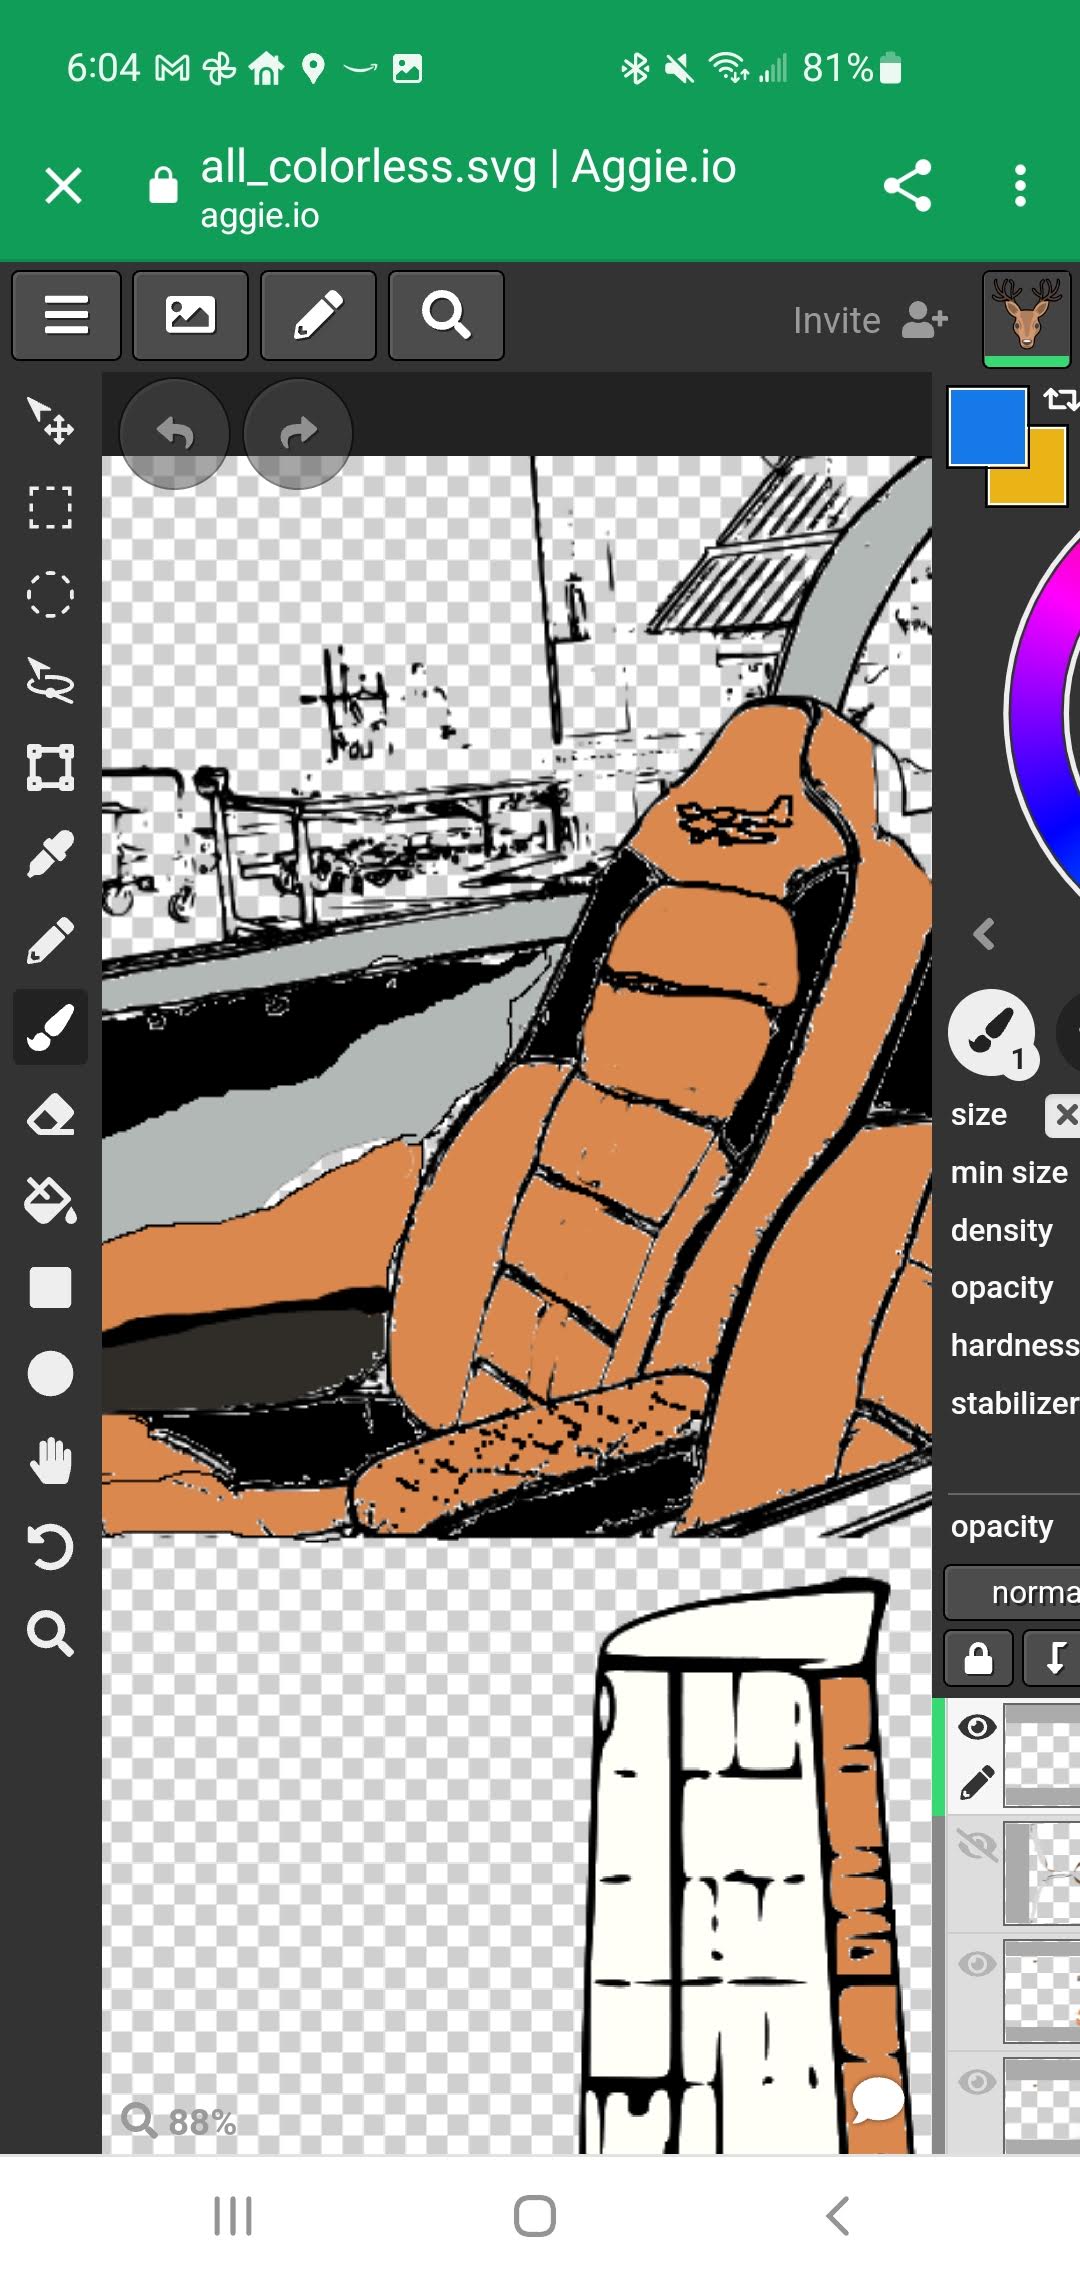
Here’s an example of a pattern page:

The outer outline is patterns with seam allowance, and the inner outline on each part is the seam line (parts need to be sewn along those lines). The numbers in the seam allowances indicate which part (parts are called “islands” in the “Export Paper Model” addon lingo) and which edge that edge connects to.
or instance, on the part marked [1] I 1, seam with numbers 16:6 indicates that it attaches to island 16 (I 16), to edge 6. Numbers of the edges are specified by numbers in V shaped marks.
Typically, number of the edge is shared the between the parts (because it is the same edge in the original model), that’s why seam 16:6 also has edge number 6 (in a V shaped mark).
The biggest patten is for the seat back (and it also had to be stretched out vertically to allow for fabric shrinkage when making pleats). In fact, with seam allowances it was a little too big, so we had to remove seam allowances. Since the Cricut
has certain margins (within which it cannot draw), we could use those margins and add seam allowances by hand when cutting the patterns out.
All our patterns are open-sourced here.
Sewing
Once the patterns are cut out, they need to be sewn together. We also wanted to add zippers to the cushions (so that cushion covers can be removed; there are ~1 cm thick and long parts in the model that represent zippers); and we found that sewing order is rather important; general rule of thumb is that we want hardest seams to be done first. For instance, pleats should be done first, before sewing any other adjacent parts.
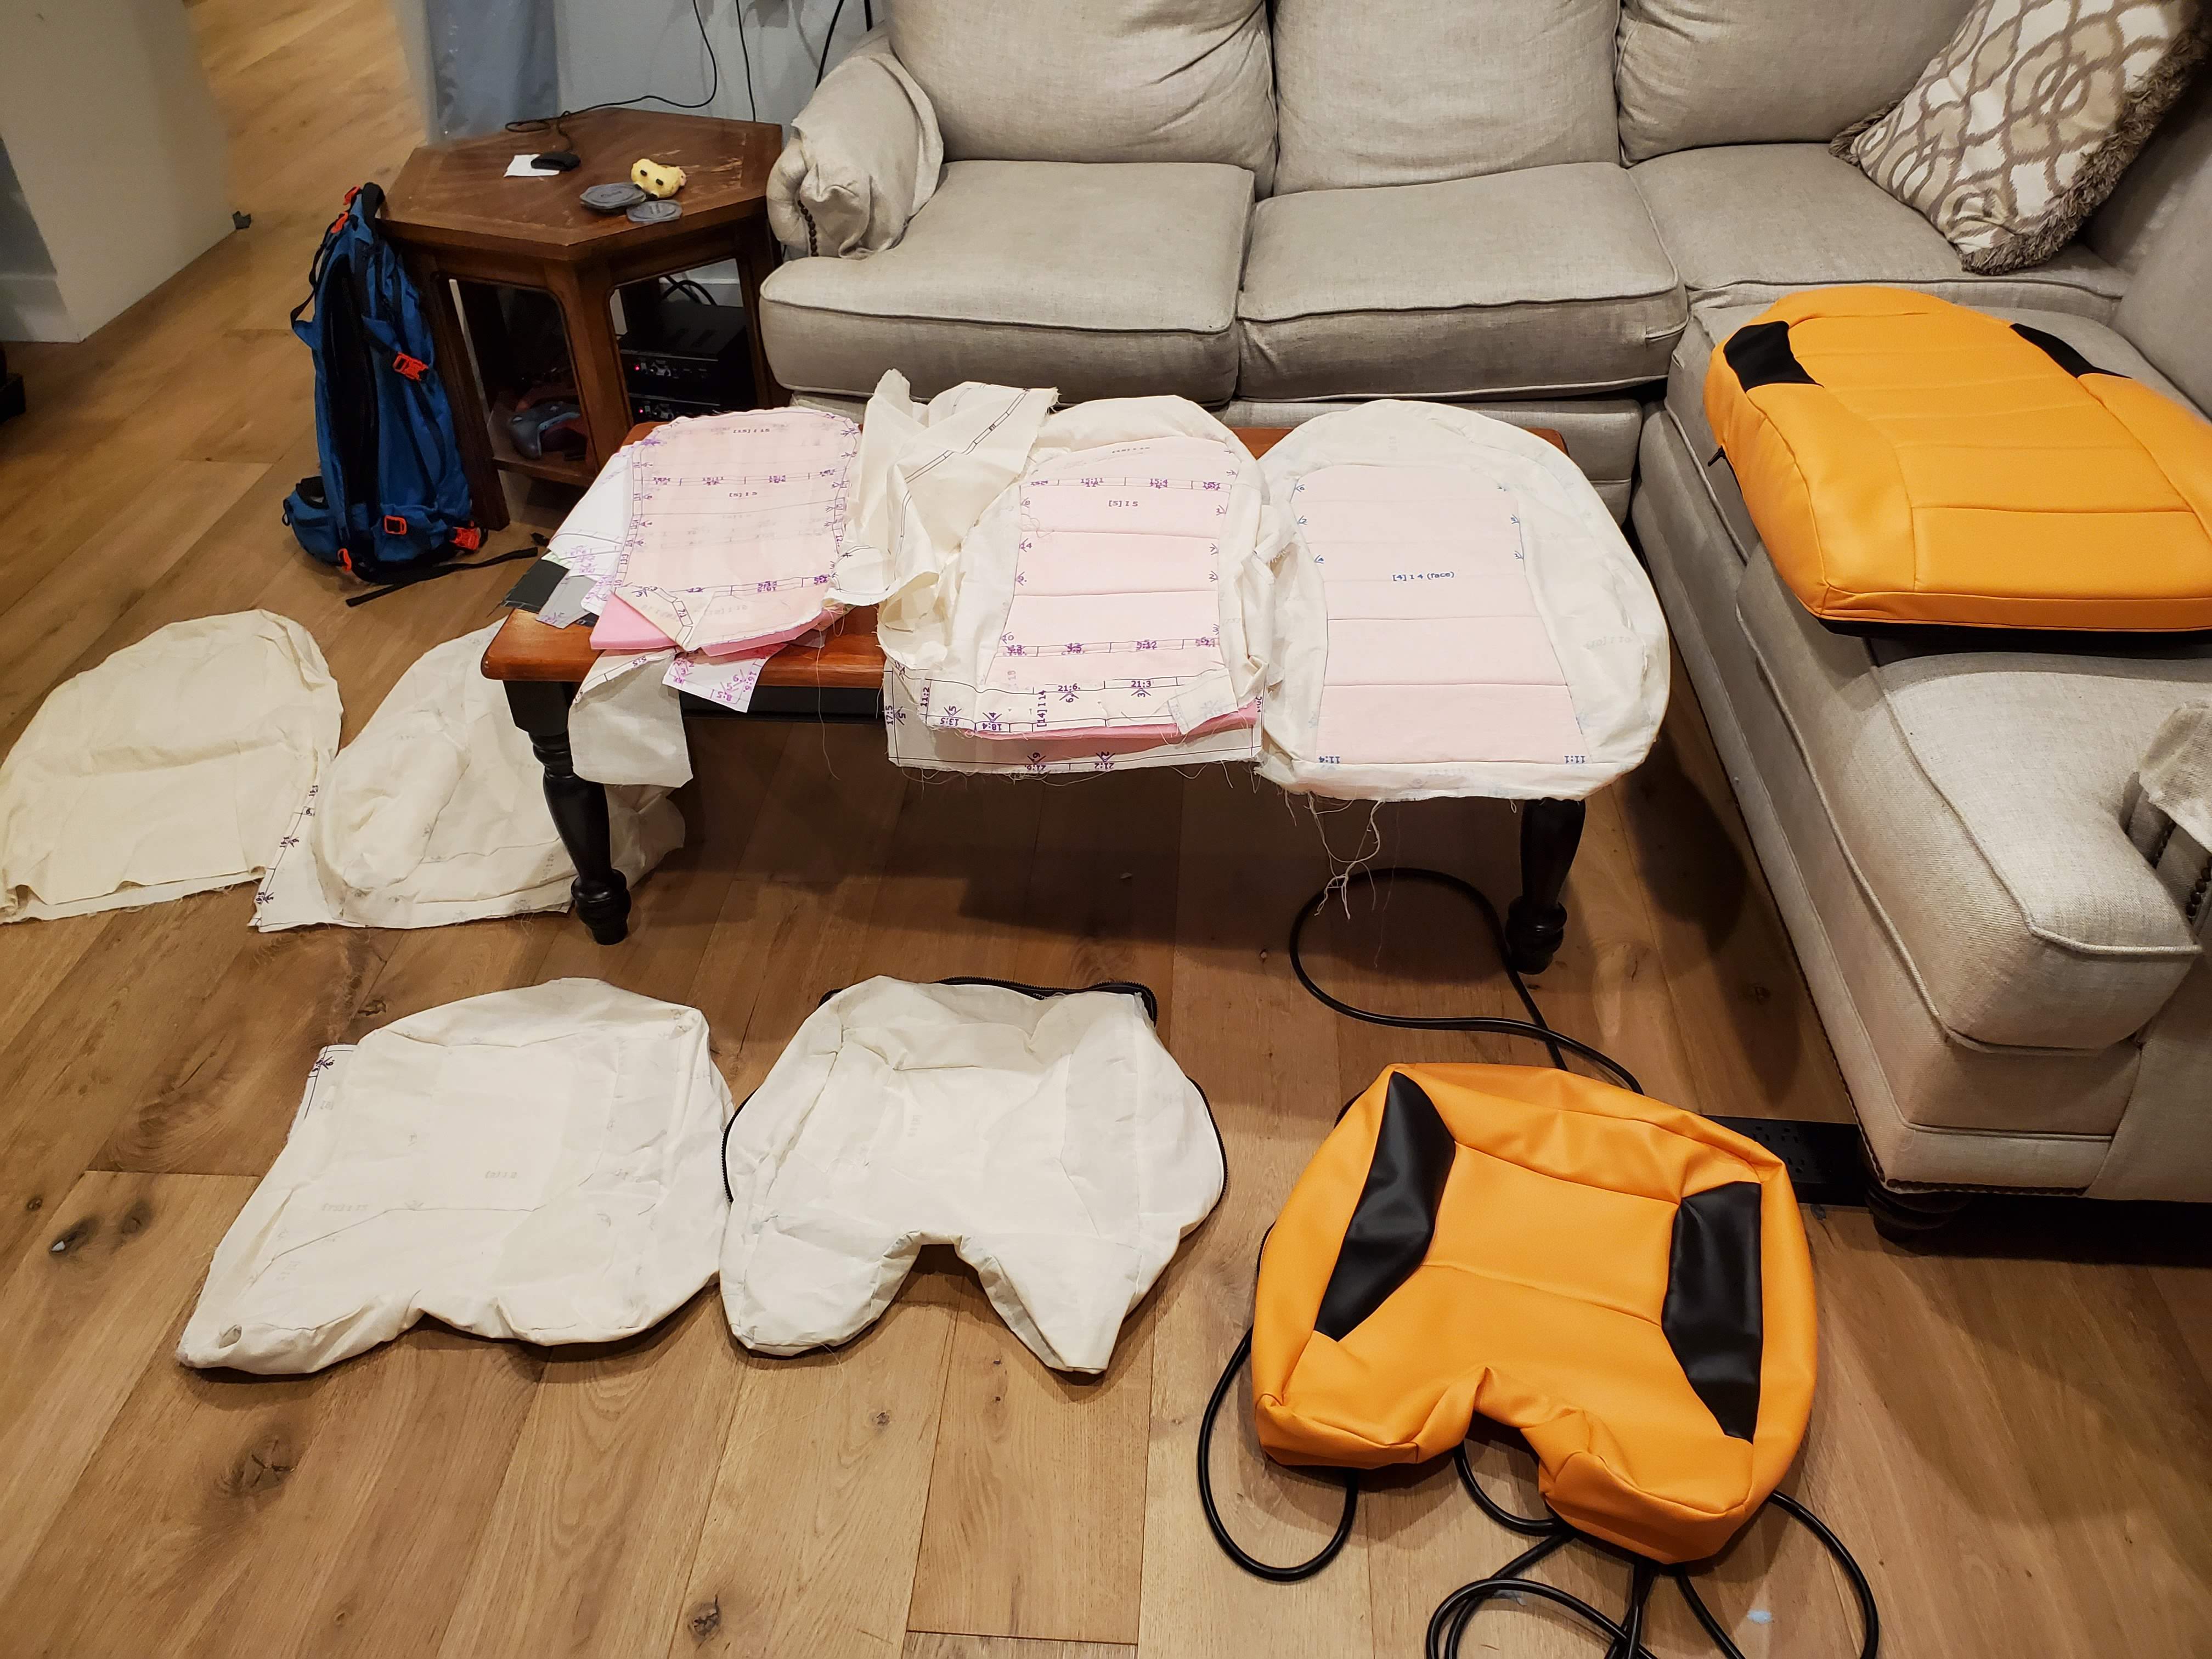
We did first several iterations of the patterns using muslin fabric, and started sewing precious ultraleather only when we were fairly confident in the design:
Sewing parts that are not co-planar (in other words, are not supposed to be in the same plane) can be tricky. The key is to pin them together correctly, and make sure that seam lines and vertices match between the parts. The more pins, the better! Also, it pays off to triple check pinning before starting to sew, as undoing stitches that are in a wrong spot takes a while.
Sewing pleats is reasonably straightforward. We used this video from Sailrite as a guide (as mentioned earlier, our published patterns already include pleat allowance – we scaled those manually in inkscape after exporting them from Blender). We used 1/4 in thick fabric-backed foam; with a walking presser foot, it can be sewn to ultraleather pretty easily.
Lastly, a rather time-consuming part is finishing the seams so that fabric and seams do not fray. We used an overlocking stitch on all ultraleather edges. For every seam, we tied the loose thread ends with a triple knot (if close to the edge or if threads can be pulled to the same side), then burnt the thread and fused it onto the fabric to ensure that the thread does not fray.
Foam cushions
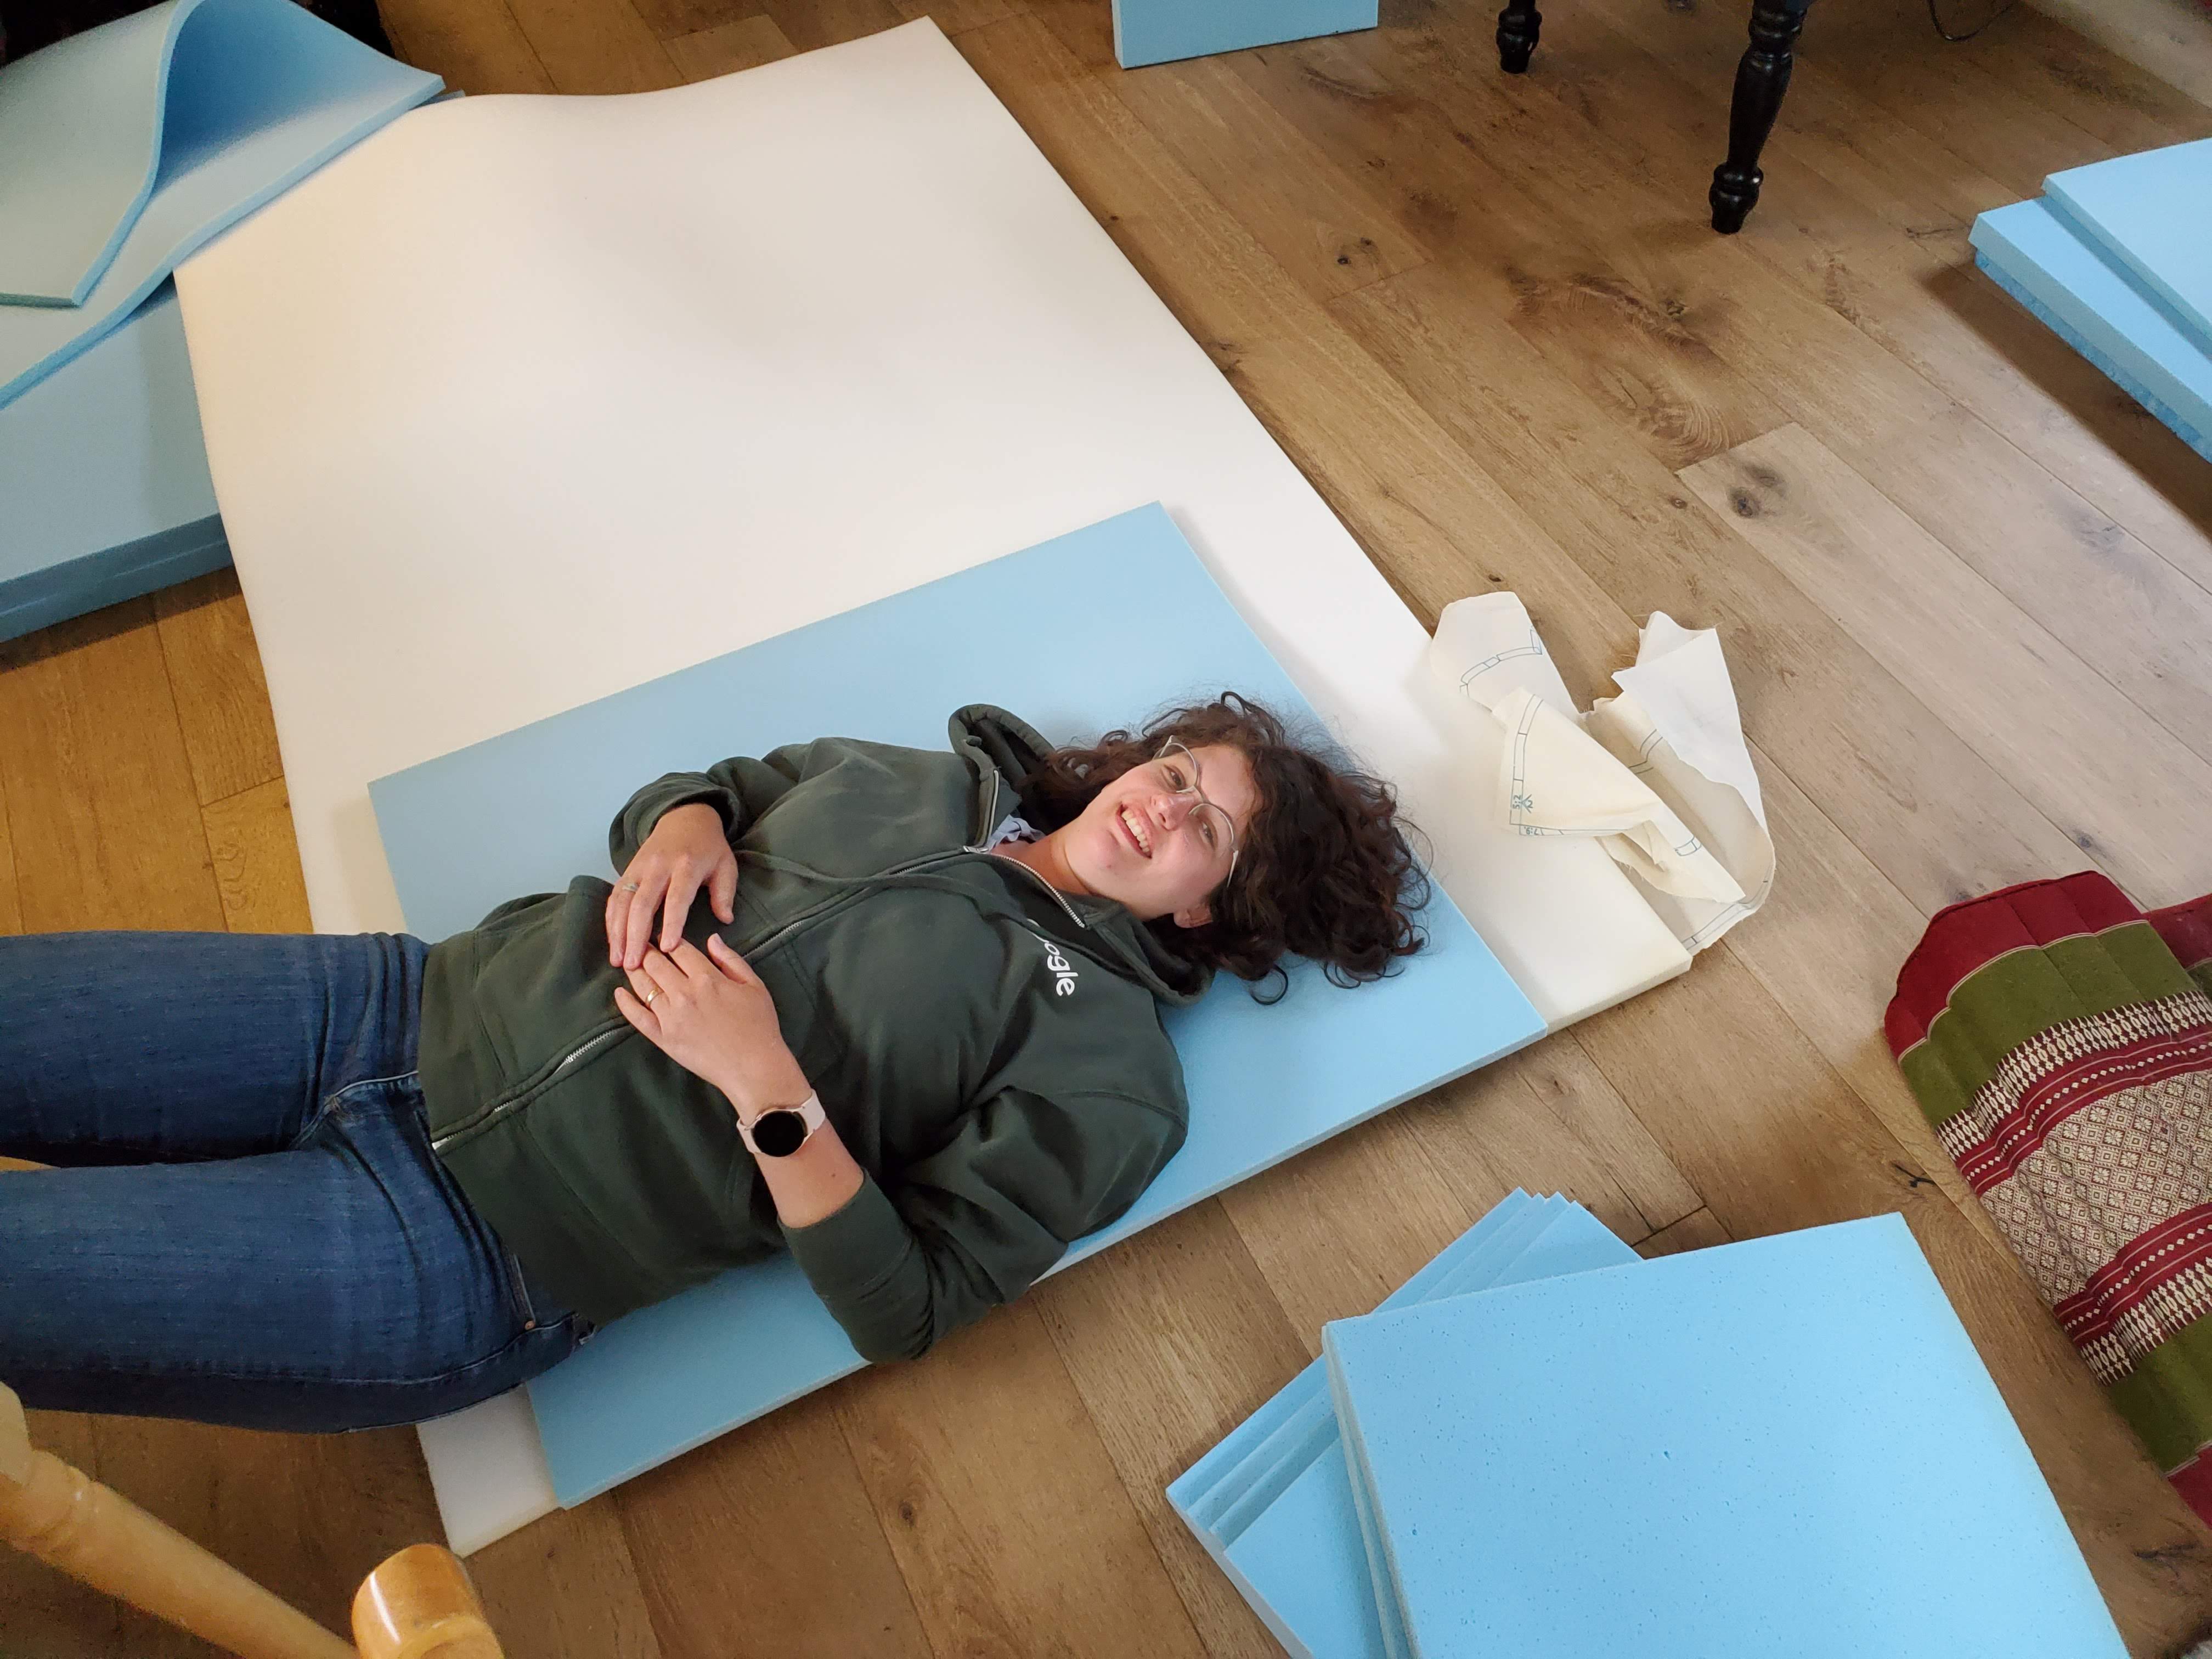
In parallel to sewing, we also worked on the foam cushions. We bought several sheets of foam of various density from discounted overstock of dynamic systems (thanks to a tip in the Van’s Air Force forums), and experimented (read sat and laid on :)) with them:
After much experimenting, we found the combination of foam we liked and proceeded to cut out and glue them with guidance from the Blender model. The trickiest bit here was the cutting - it requires a bit of technique to get it right, especially the ramps. Sasha found that the easiest way to do ramps was to start the cut with a very sharp serrated bread knife, and then finish off with scissors.
When we put the cushions and cushion covers together, the result looked like this:

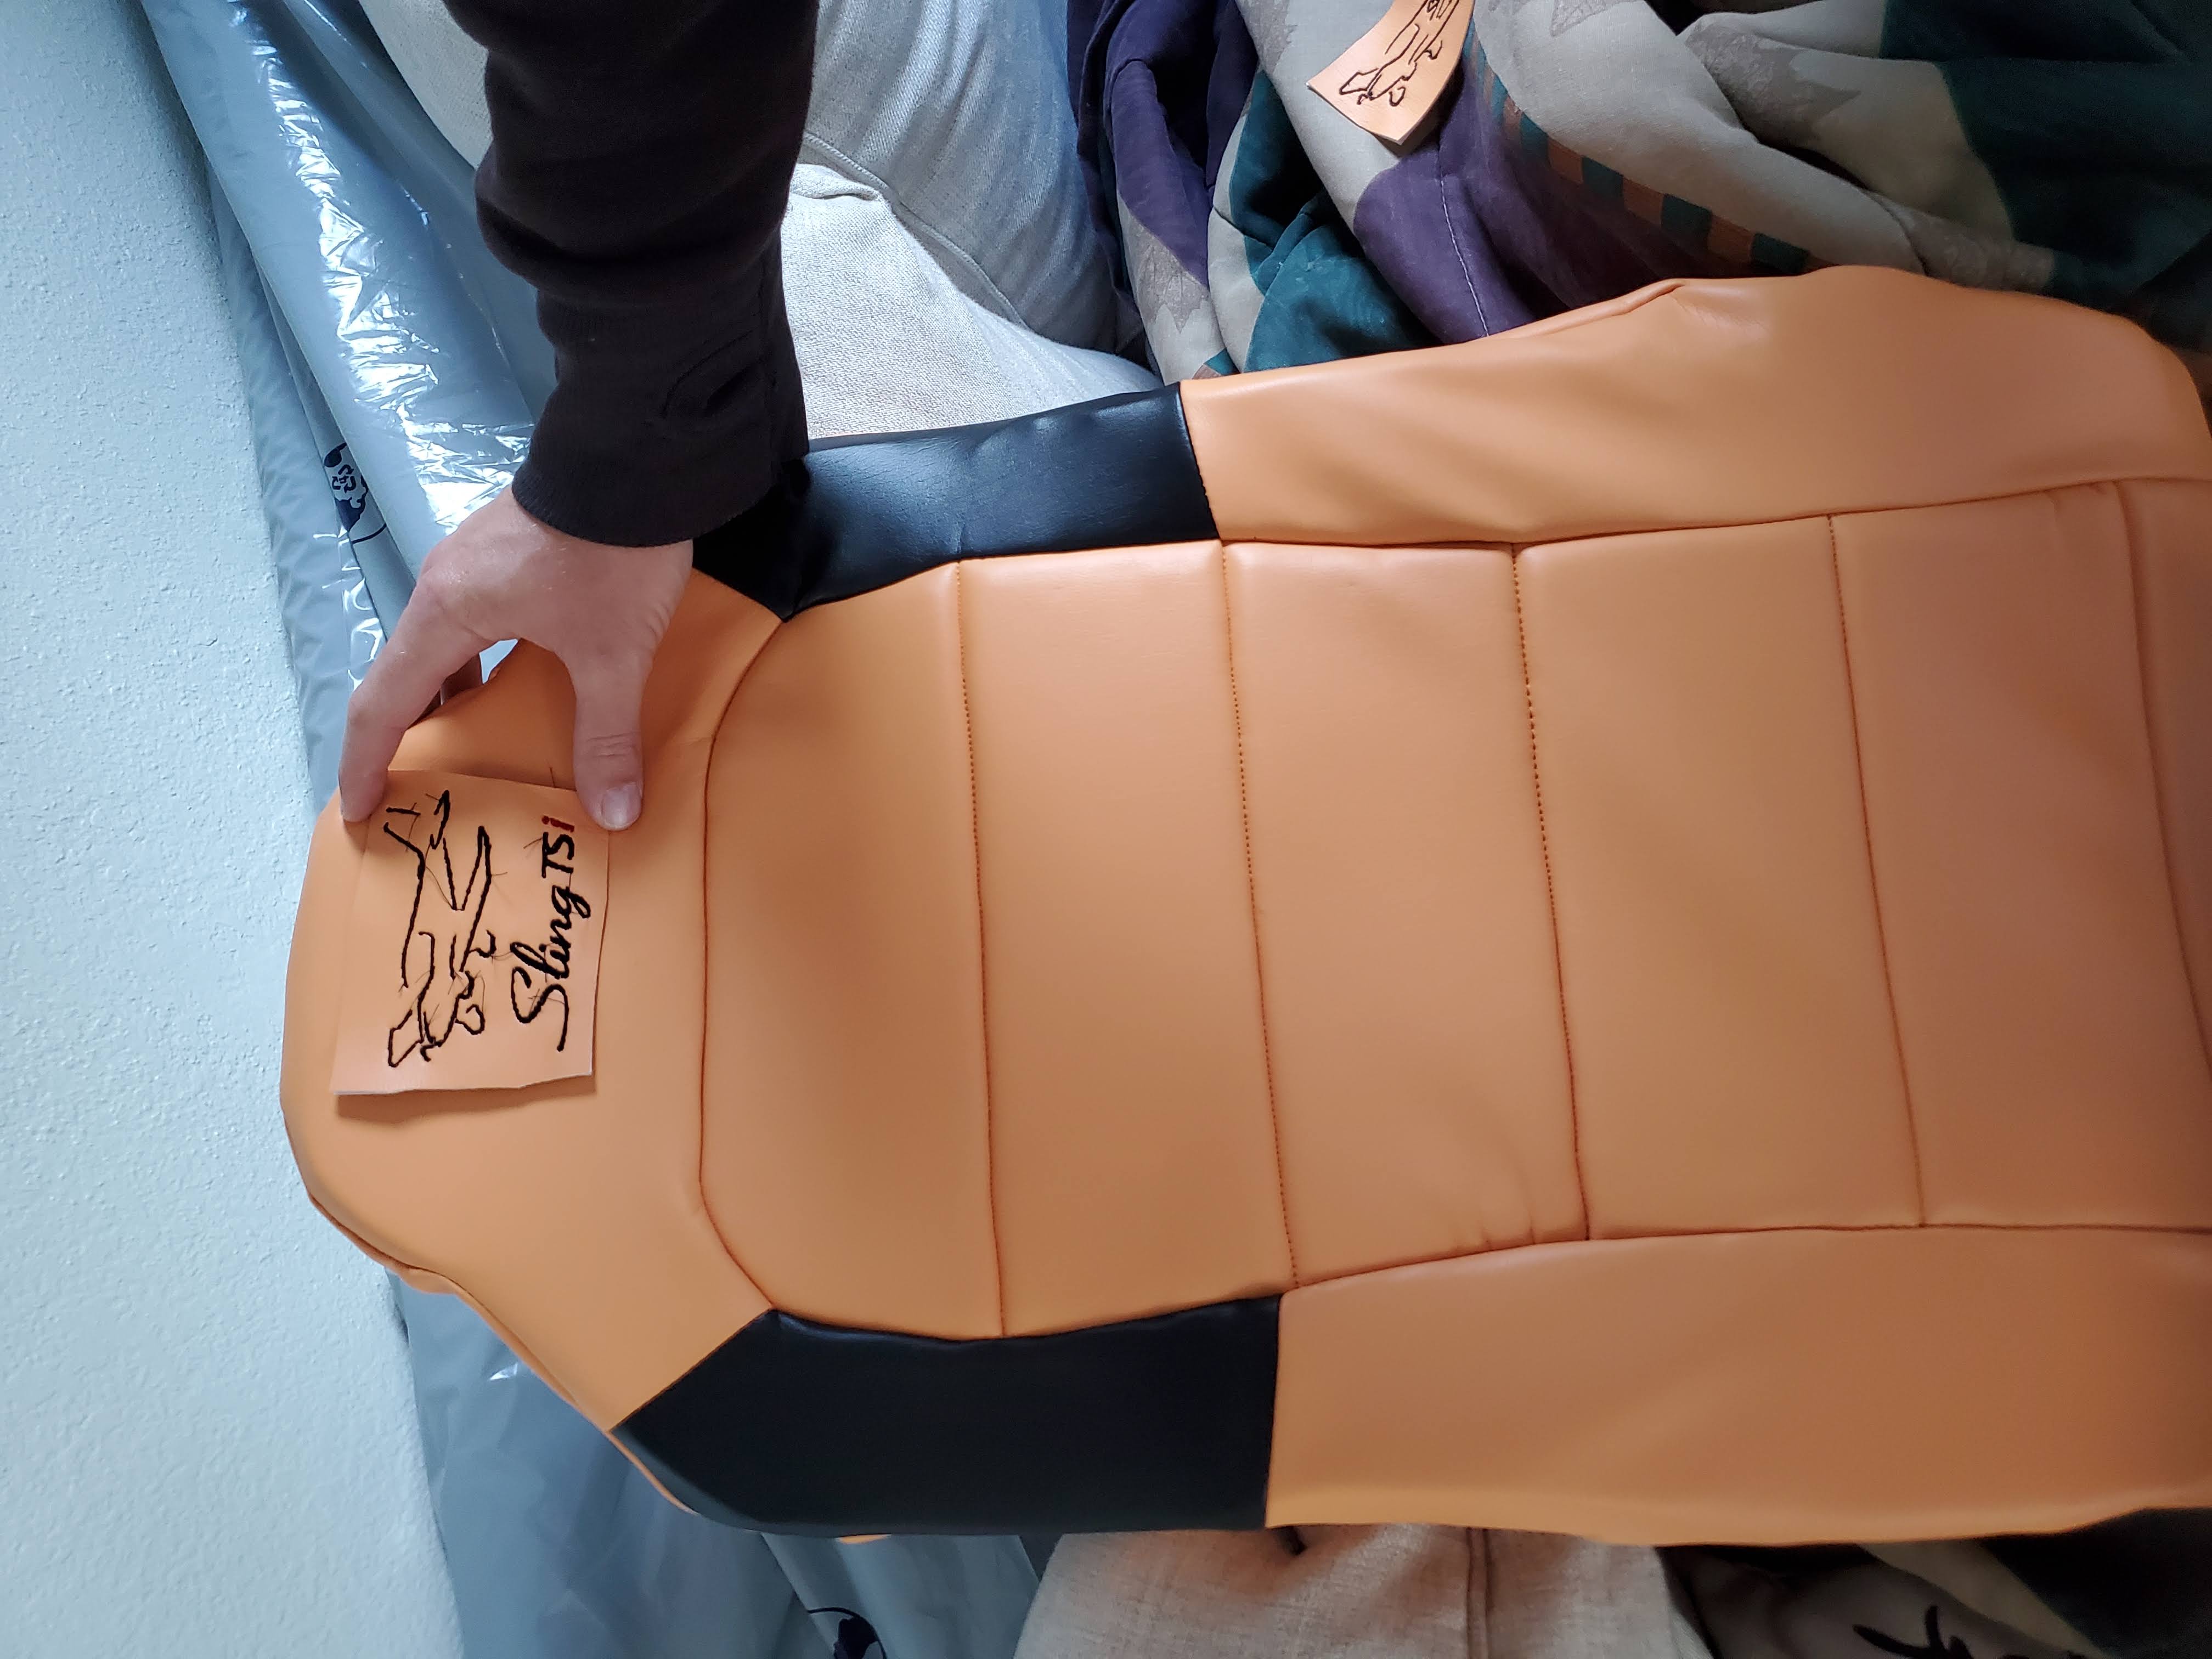
The last part of this was the embroidery; we “borrowed” a machine from Amazon for this purpose - the Brother SE600 and it served us very well. With instructions from our local makerspace, we transcribed the final part of our vision: little embroidered airplanes :)
A word of caution - we did this part last because it was not high on the priority list. For future readers who may endeavor the same, it is highly recommended to do embroidery FIRST. While it is possible to do embroidery on a finished garment, it is a lot easier to do it on an unfinished garment (e.g. the cut-out of the seat pillow, instead of the whole seat cover). We tore a hole in our first seat cover out of frustration at 2 am on a worknight trying to get the damn machine to embroider in the right place: not recommended :(
The other finicky thing was that the default stitch length in the program recommended by our makerspace is too big for very cute little airplanes. It took much experimenting to figure out that this was the issue - in the beginning, our embroidery just looked little bit off (even if we ignore the uncut jump stitches):
Word on the jump stitches (for those who don’t know what those are – those are loose-looking threads between different parts of embroidery, seen in the picture above, and they are a natural part of the embroidery process). Tutorials on the internet recommended pulling jump stiches to the opposite side with snag-nab-it. That does not work with ultraleather very well, as snag-nab-it leaves a noticeable hole. Sharp fine-point scissors worked best for us (and cutting the jump stitches on the right side as close as possible to the pattern).
After some experimenting (read a lot of experimenting – we made a joke that, if “Sling Tsi” was a person, and they were to see our leaving room, they would be quite concerned about our obsession) with stitch density, we arrived to a version that we liked best. That required:
- smaller stitch size
- higher stitch density
- using embroidery thread. Embroidery machine can use regular thread, and it works just fine for larger stitches, but smaller stitches get messed up unless embroidery thread is used.
When changing embroidery colors (like “i” in “TSi” is red in our design), changing color of the bobbin is not required, using default black thread is fine, as the bobbin thread does not show on the right side.
Aaaaand here is how our seats are finally looking like!
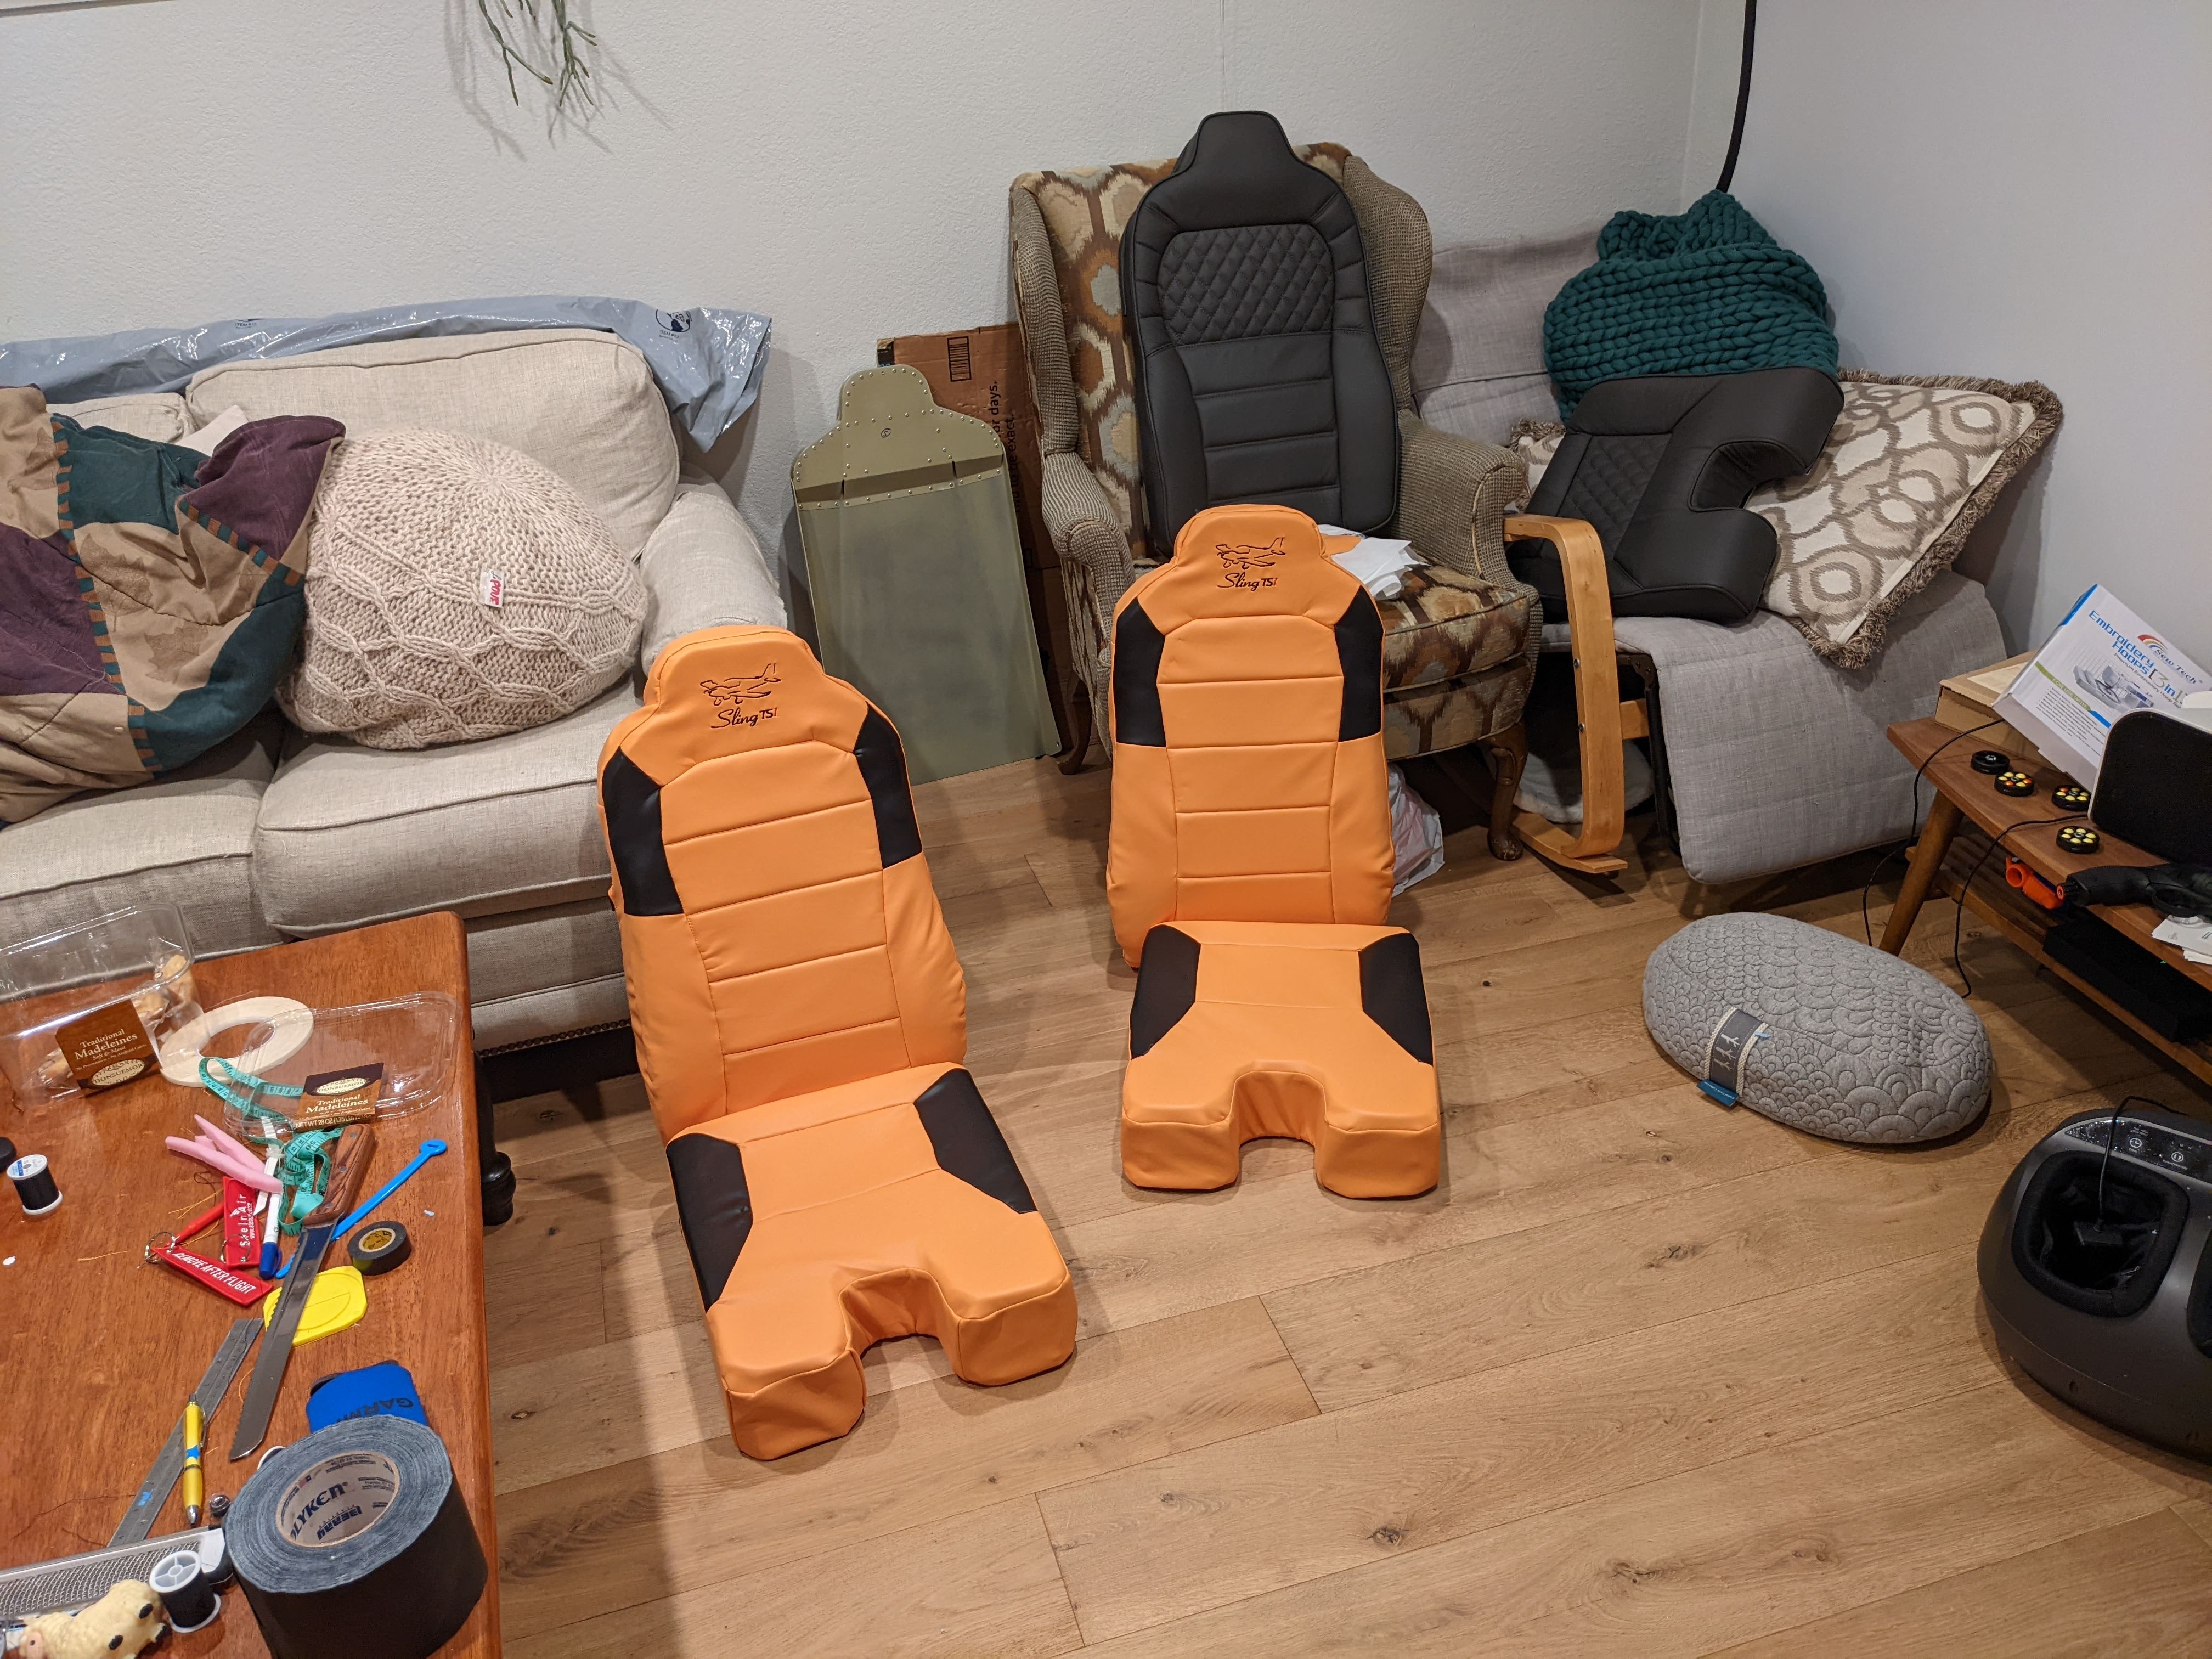
We are very happy (and proud) with how the seats came together, they look just like our vision board, are very comfortable, and have perfectly tuned lumbar and side support. On the down side (other than taking a lot of effort to sew), our seats look less shaped than factory seats (Claude’s seats are seen in the background in the picture above). We are now taking a break from upholstery, and will continue with sewing the back seat after phase 1 flight testing. If you, dear readers, have questions about 3d models, patterns, or have experience in how in making upholstery looking more shaped, leave a comment below!
#upholstery